Showing posts with label fast craft. Show all posts

Tuesday, October 23, 2012

Halloween Lunch Bags }{ Tutorial

With the 31st of October just around the corner, I feel like everything is excuse to do some cute Halloween-y craft. This one is easy, perfect for the little ones in your life, and made with simple materials you can find in almost everyone's home.

So let's get crafting.

What you need:
  • paper lunch bags
  • construction paper in white and black for the mummy (and for the vampire as well)
  • glue
  • scissors
  • crayons and markers for adding details (optional)
What you do (for the mummy, the easiest one):

  1. fold the open end of the lunch bag down about 1/4 of the full length (see picture)
  2. fold the bottom so that both sides are going down (see pictures)
  3. cut out shapes from the constructions paper: white and black circles for the eyes, a crooked mouth, some longer strips of white construction paper.
  4. Glue the strips of white paper all over the bag with the top folded down; lastly add the eyes and mouth. 
  5. For other characters like the vampire or the owl, this is where you'd add some extra details with crayons or markers (e.g. blood on the fangs).


The steps are the same no matter what character you make, but the shapes you cut out and the construction paper colors are different obviously. I can also imagine how easy it would be to do a Frankenstein one, or a skull. What Halloween monster/character would you make?

Saturday, October 29, 2011

Little ghost garland }{ tutorial

Do you know one reason (among many) I love Fall? There are so many excuses for crafting and inspiration kisses your face as soon as you walk outside. I'm glad my husband isn't a jealous guy.

With a little one in my house, Halloween is one of these excuses to go crazy creating stuff, costumes, decorations, what have you. We can always use a new item to put up for the season, right? And we do end having so much fun doing it together as a family.


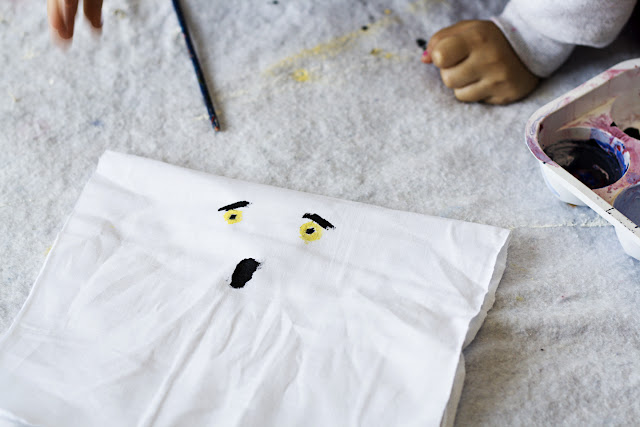
This project I'm sharing is a quick and easy one that we did last weekend - a garland of little ghosts that you can hang anywhere.  N. had a great time with this one. The ghost faces were easy enough that she could do some of them on her own, and she loved the results. She actually kept a few of the ghosts to play with.

What you need:

  • scraps of muslin
  • styrofoam balls
  • string
  • brushes and paint

Steps:


  1. Fold the scrap in half (or a piece of rectangular muslin you cut), then paint the face near the fold.
  2. Place a styrofoam ball under the top, behind the face you painted. Tie the fabric tightly just under the ball with the string.
  3. Repeat with as many little ghosts as you want. 
  4. Once you have your ghosts, place a long string through the knots under their heads and voila. Now all you need is to hang it up anywhere you want.


Happy Halloween everyone!

Thursday, December 2, 2010

The 5-minute mama crafter

N. watched Frosty the Snowman for the first time a couple of weeks ago. Oh boy. She hasn't stopped talking about snowmen, Frosty, Santa Claus, "Karen," and Christmas in general. It doesn't help that every house in town has put their lights and decorations up (including us).

So yesterday we were killing time and playing before our bedtime routine, and she kept asking me for Frosty. So I decided to make her one with scrap materials we had around. It took us all of 5 minutes too! My favorite kind of baby craft.


Materials:
2 styrofoam balls (one small, one medium; or one medium, one large)
some red felt for the scarf
some black felt for the hat (which quickly got destroyed and thrown away by miss N.)
1 Toothpick
Chenille piper cleaners
Black and orange paper
Glue

How we did it:

I broke the toothpick into a smaller piece, so that I could stick each end of a different styrofoam ball. Then I cut the eyes and mouth out of black paper and glued it on the smaller ball (the face). Cute the red felt into a scarf and glued it where the two balls were connecting. I cut small pieces of the pipe cleaner and stuck them on the sides of the bigger ball for his arms. Then I took another piece of the toothpick and stuck it at the very corner of the mouth (for Frosty's pipe). I tried to imitate Frosty's button nose with black paper, but didn't like the results, so I decided to use a carrot nose (N. didn't notice). I cut a long and narrow piece of orange paper and rolled into a "nose" like you see above, took another piece of the toothpick and glued it to the inside of the orange nose and stuck it in the face (poor Frosty was stabbed a few times during this process...). Then I did something similar to the pipe (cut orange paper, glue the end of the pipe toothpick to the inside).

The hat... It took me the longest, cutting out round pieces of felt for the bottom and top of the hat, then a long one for the wrap around. It looked like a top hat... I glued it to Frosty's head but miss N. wouldn't wait until it dried (I should have used a hot glue gun, maybe?) and the thing got destroyed very, very quickly.

But I really like how it came out anyway, and so after she played with him he proudly went into our balustrade's pine needles among the lights and other things.