Showing posts with label easy. Show all posts

Wednesday, February 13, 2013

Valentine's wreath }{ tutorial

My daughter's favorite color is pink. No surprise then that she goes crazy around Valentine's day, specially if we happen to stop by Joann. And we did.

She begged me to buy half of the seasonal decor on display at the store, but instead I promised her we'd do our own. Lucky for me, she loves to do craft projects. Thus, today's post was born.

As I mentioned in the last post, this month's themes are organizing and re-purposing. After unpacking quite a few boxes we're surrounded by empty boxes, so I decided to use some cardboard for the project as a way to recycle it and save some money as well.

Materials
  • cardboard (or whatever you have that's easy to cut but still sturdy)
  • scissors
  • gesso/paint (optional)
  • paint brushes (optional)
  • glue
  • tissue paper (or other decorations like pom poms or buttons)
  • ribbon
Steps:

1) Draw the heart shape on the cardboard. It doesn't have to be neat since it will get covered up.


2) Cut out the shape. If you'd like a wreath like backing, cut out the middle as well. We ended up using both parts.

3) Paint the backing with gesso/paint. We did this in case some showed through the tissue paper. It turns out you need a couple of coats and my little one was not that patient, so some of her heart has the box' original paint showing through. It didn't matter to her (reminder: crafting with kids is all about the process, not the product).


4) Dry it with a blow dryer (much quicker, helps the wee ones stay with the project)

5) Spread some glue on a medium sized area (~4 inches), rip tissue paper a little at a time, scrunch it up and attach it to the backing. This will go a little faster if you use larger pieces of paper, and if you don't put them super close together. I did (so it took much longer), but the little miss did not. She also decided to cover her middle with the tissue paper.


6) Repeat step 5 until the whole wreath is covered up. This is where you can let your creativity run wild. Use buttons, combinations of colors, glitter, pom poms, whatever. See what you come up with.


7) Cut a piece or ribbon and glue each end to one bump on the back of the heart (to hang it up). Done! After it's dry just go hang it up. The little miss' went outside for everyone to see, but I took a picture of both so you can see them.


Happy Valentine's Day!

Do you make projects inspired by what you see at the store? I'd love to hear examples.

Wednesday, October 3, 2012

Painting Mini Pumpkins }{ crafting with kids

Here's an idea for an easy and fun activity during a Fall afternoon: painting some mini pumpkins.

These mini pumpkins are very inexpensive at pumpkins farms, but our grocery store also offers them as a kit that comes with some paint. Everything you need is right there in the package. If you get the pumpkins individually, acrylic paint should work fine.

Just give the kids (and adults!) some paint, brushes, sharpies or paint pens and let them come up with whatever design/pattern/faces they want. Fun for the whole family. And I also like the mini pumpkins early in the season because they don't rot as quickly as the bigger ones we carve every year.


Apologies for the wonky photos, they were taken while holding a 6 week old wiggly girl...

How do you like to decorate your pumpkins?

Saturday, October 29, 2011

Little ghost garland }{ tutorial

Do you know one reason (among many) I love Fall? There are so many excuses for crafting and inspiration kisses your face as soon as you walk outside. I'm glad my husband isn't a jealous guy.

With a little one in my house, Halloween is one of these excuses to go crazy creating stuff, costumes, decorations, what have you. We can always use a new item to put up for the season, right? And we do end having so much fun doing it together as a family.


This project I'm sharing is a quick and easy one that we did last weekend - a garland of little ghosts that you can hang anywhere.  N. had a great time with this one. The ghost faces were easy enough that she could do some of them on her own, and she loved the results. She actually kept a few of the ghosts to play with.

What you need:

  • scraps of muslin
  • styrofoam balls
  • string
  • brushes and paint

Steps:


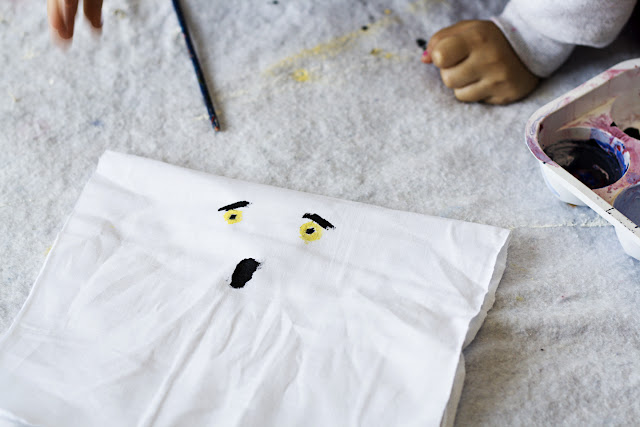
  1. Fold the scrap in half (or a piece of rectangular muslin you cut), then paint the face near the fold.
  2. Place a styrofoam ball under the top, behind the face you painted. Tie the fabric tightly just under the ball with the string.
  3. Repeat with as many little ghosts as you want. 
  4. Once you have your ghosts, place a long string through the knots under their heads and voila. Now all you need is to hang it up anywhere you want.


Happy Halloween everyone!

Wednesday, June 1, 2011

Paper flower card }{ Tutorial Thursday

And I'm back with a card tutorial!

Are you sick of them yet? They are just so easy, quick, and you can use them for so many occasions, even just a simple hello to an old friend.

Back in April, I made some paper flowers based on a Creative Jewish Mom tutorial. I wasn't very happy with how I used them, but I loved the flowers themselves. So I let some ideas brew in my head of how to use them. This is one of those ideas.

Materials:
  • cardstock in two coordinating colors
  • green patterned paper
  • red and light pink tissue paper
  • scissors
  • glue
  • buttons
  • permanent marker or pen
How to make it:

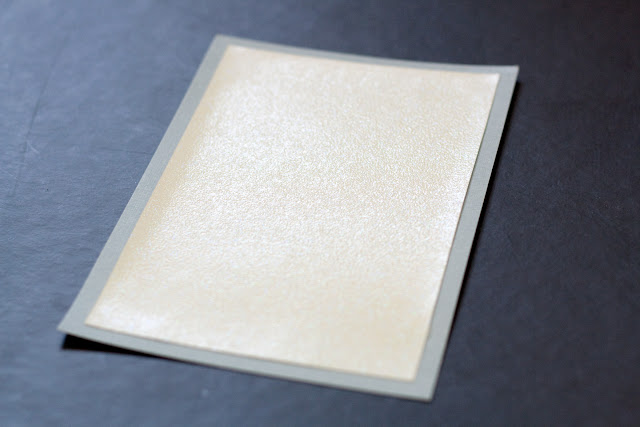
Step 1: Choose a card stock backing for your card and then a coordinating top panel. I choose a simple blue backing with some sparkling off white for the top panel to get some glitz in there.


Step 2: Cut the top panel on all sides slightly so that the backing shows, then glue them together. My backing was 4.5 wide by 6.5 long, and I cut my top panel down to 4 by 6.


Step 3: Cut the green patterned paper the same width of the top panel, and about 2 inches long. Cut the top in narrow strips (about 1.5 inches)  to make it look like grass. Glue it to the top panel.


Step 4: Draw the stem on the top panel.


Step 5: Make the flower with tissue paper following the tutorial on Creative Jewish Mom. The only change I made was that I didn't secure the petals together with paper brads. Instead I glued them down on the card and on top of one another.

Step 6: Glue a button on the center of the flower.


You can add whatever sentiment you want to the card or leave it as is.


Here's another one I made with a paper flower:


I really like how the flowers pop out of the cards and create some dimension.

How would you use the paper flowers? 
Pin It

Friday, April 22, 2011

Sewing skirts

Wanna know a secret? I'm terrified of sewing patterns.  They always make things harder for me. Whenever I can find projects online or figure out ways to sew something cute without patterns, I jump at the opportunity. 

Neither this skirt nor this lion followed a pattern. I just tried to figure things out in my mind. 

A while back a had found this sewing tutorial where you make a skirt out of a dish towel in the wonderful Grace Violet blog, and oh boy, I wanted to try it out so badly. Then yesterday, I was at the fabric store getting some basic supplies (elastic, etc) and saw this adorable dish towel. Hooray! I grabbed it  right way (for less than $5 - it was on sale), so I could finally try out the skirt. 

Check out how cute! And the fabric that I cut off the sides, I used to make a matching headband. I can't wait for the little one to try it out. 


Cheap, easy, and cute sewing project - what else could I ask for?

Would you sew clothing out of home decor items? How do you channel your inner Maria VonTrapp?

Friday, March 11, 2011

Spring-y skirt tutorial for (very) beginner seamstresses

It's snowing again. A lot.

Sooo, in hopes of calling Spring to us I've been sewing lots of floral, fun skirts for N. to wear when Spring does finally come.


Here's what I did:

  1. Cut your fabric of choice the entire of width you'll need (front and back of the skirt) - for N., a 2T size, I cut 24 inches
  2. Measure 1/4 in on each side, fold and iron well.
  3. Measure a 1/2 in at top, iron, pin, and sew leaving the middle open to pass the elastic through.
  4. Pin and sew ribbon along the stitches at top (optional)
  5. Pin and sew ruffles at bottom (optional) - this was tougher than I thought. The fabric was stretchy and keeping my stitches straight turned out to be mission impossible for me.
  6. Cut elastic a much shorter length, so that the top will bunch up, but not too short that it'll be too tight. For N. I cut 18 inches of elastic and that worked out great.
  7. Using a diaper pin or something similar, grab the elastic and pull through. Since there's more skirt than elastic, when the elastic end is getting close to the fabric opening, pin them together so it won't go completely through. Once both ends of the elastic are once more outside of the fabric, pin and sew them together (1 inch).
  8. Cover the sewed section of the elastic with the fabric.
  9. Using the 1/4 inch folds you ironed earlier, pin and sew the skirt closed - sew the 1/4" right sides together, including the ruffles.
Done!

Care to share your easiest, fastest sewing project? Or it doesn't have to be sewing - all crafts are welcome here. :)