Showing posts with label pattern. Show all posts

Tuesday, November 27, 2012

Headbands for Christmas }{ crochet pattern

I'm thinking this will be the last in a series of crochet and knitting posts I've been writing.

Following the headband and the scarf, today I'm sharing the pattern I used for the flowers I used in the girls' headbands for Christmas. It's a modified version of a flower pattern I learned a while back, but I can't remember where I got it from.


The pattern itself is simple and easy, but I wanted to share it because of the scalloped edges it creates. Making scalloped edges in crochet projects creates a cute little detail and it's so easy. The secret is to crochet some double or half double crochet stitches in the same stitch, then skip the next and slip stitch in the following stitch. Easy, right? You'll see what I mean in the pattern below.

In terms of yarn and hooks, I used an E hook and sport weight yarn, but that can be changed. Play around with different weights and hooks to find the results you like best.

CH = chain
DC = double crochet
SL = slip stitch

Pattern for base:

  1. CH 17
  2. Row 1: In 5th ch from the hook (including the chain on the hook, count 5 backwards), DC. *ch 1, skip the next ch, then DC, ch 1, DC in the following chain*. Repeat steps between ** until you reach the end. 
  3. Row 2: CH 3, turn. This will be your first "DC" in this row. 5 DC in first ch 1 space, *SL in the next ch 1 space, 6 DC in the next ch 1 space*. Repeat steps between ** until the end of the row.
  4. Tie it off leaving a long tale for sewing the flower together with a tapestry needle, then attaching it to the headband.
Pattern for second layer:

  1. CH 17
  2. Row 1: In 5th ch from the hook (including the chain on the hook, count 5 backwards), 5 DC. *skip the next ch, sl in the following ch, 6 DC in the next*. Repeat steps between ** until you reach the end. 
  3. Tie it off leaving a long tale for sewing the flower together with a tapestry needle, then attaching it to the flower base.


The princess asked me to add a "jewel" to the middle and I let her pick one for me to attach with hot glue. Done! Then reluctantly, the dragon modeled the finished headbands.

what's this you've got on my head, mom?

Tuesday, November 13, 2012

Easy scarf and headband }{ Knitting

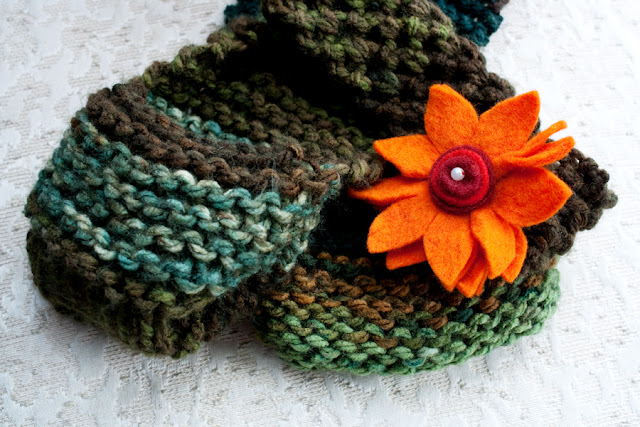
Remember the scarf I mentioned back in September? I realized I never shared the finished product with you. I added some pockets at the end of the scarf in a simple way, made this headband, and added a bright flower to the headband. I quite like it and decided it was worth sharing the pattern for it.


Materials:

  • Size US 13 knitting needles 
  • Bulky yarn
I didn't measure the gauge because I feel like scarves are so flexible. It's really up to you to decide what feels most comfortable in terms of width and length. So follow these instructions with the caveat that length and width can and should be adjusted to fit you and your taste.

What I did:

  1. Cast on 14 stitches (this is where you would adjust the width - anywhere between 10 and 18, with 10 being very, very thin)
  2. Rows 1-12: knit straight through
  3. Row 13: purl
  4. Row 14: knit
  5. Row 15: purl
  6. Row 16: knit
  7. Rows 17-28: purl
  8. Row 29: knit
  9. Row 30: purl
  10. Row 31: knit
  11. Row 32: purl
  12. Repeat rows 1-32 until you're satisfied with the length.
  13. Once it's as long as you want it, repeat it one more time (to have enough scarf for pockets). Bind off and weave loose yarn. Fold both ends on their wrong sides, just enough to form two pockets that fit your hands. Sew the sides and turn them right side out. 


I'd share a self-portrait wearing them but the Dragon doesn't let me sleep enough, or wear clothes long enough without spitting up to allow for a decent photo. Maybe soon.

How are you keeping warm this Fall? 


Tuesday, September 25, 2012

Quick crochet headband

Fall still has me in the mood for the needle arts, but this time the little misses got to choose the color (well, the princess did). So pink it is!

This headband is so easy and quick, I've been making it left and right for different girls in my life. It truly is the "genius" headband as the original designer calls it. By the way, that designer is Elizabeth Alan of the Lovely Crow (you should check out her facebook and Ravelry pages). She offers this pattern for free with youtube videos to help you along (though it's an easy pattern to begin with).

The original was a bit wider than I like, however, so I modified it slightly. Here's how my modifications ended up:

before weaving in the loose ends


  1. chain 7
  2. Row 1 - slip stitch on the third chain from the hook and chain 3, slip stitch on the last chain and chain 4
  3. Row 2 - slip stitch through the first oval and chain 3, slip stitch through the last oval and chain 4
  4. repeat row 2 until you're happy with the length. Finish your last row without the chain 4.
  5. Tie the two ends together by: chain 2 from the end of the last row, slip stitch through the first oval in row 1, chain 2, slip stitch through the first oval in the last row, chain 2, slip stitch through the last oval in row 1, chain 2, slip stitch through the last oval in the last row, chain 2, slip stitch through a chain on the edge of row 1.
  6. Weave in loose ends with tapestry needle.


That gives you a headband that's thinner and with only two little oval loops on each row. Here's the princess modeling hers for me:


Any quick and easy patterns/crafts to share?

Tuesday, June 19, 2012

Sweet crochet }{ tutorial

It's been a while since I've shown any crochet or knitting and lately I've been working with it again. I'm getting some things done for the baby girl arriving soon. But what I want to share today is a request from N.

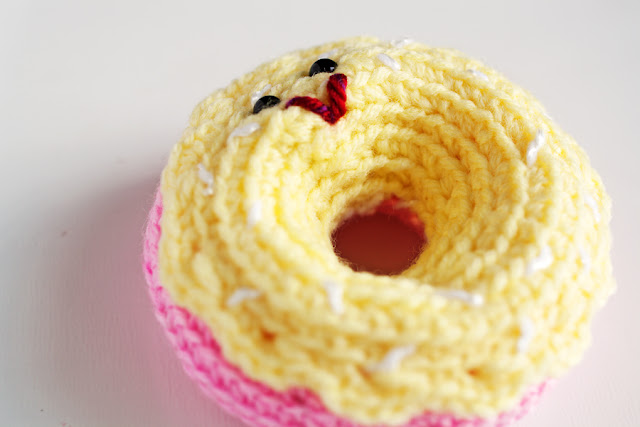
She saw the book "Yummy Crochet" by Kristen Rask and asked me to make her a doughnut. No problem, easy and quick. But then she wanted a cherry on top and a candle. Hmmm. I decided to try and come up with my own.

Here it is: a rough pattern for a small crochet cherry (not quite a proper tutorial, oops).

sc = single crochet
st = stitch

*make a sloppy slip knot and chain two (or magic ring)
round 1: 6sc in first stitch (or 6sc in magic ring)
round 2: 1sc in each st then flip it inside out (so that the tail can go inside the berry)
If you want a bigger cherry, keep repeating that: 1sc in each st until you're happy with the size. It will be long though. For a rounder one, there's a different pattern. I'll share that another day.
round 3: 1sc, skip 1st (you'll have 3 stitches)
round 4: chain 3 and tie it off. Alternatively, you can chain one and tie it off leaving a tail as the cherry's stem


She liked it so much that now she's asking for a cupcake and then cookies. Such a sweet crochet tooth...

What food would you like to see as crochet?